
Book cover creation tips
◆Tips for making a book cover kit
First of all, I would like to thank everyone who ordered a kit when I returned to Japan recently. I received many orders from all over Japan. What was notable was the number of people who ordered the new book cover kit as their first Kogin embroidery piece. Many people ordered it together with the starter kit , but some people also wrote in messages that they were trying Kogin embroidery for the first time, and I felt the need to follow up. So today, I would like to introduce some simple tips.
◆The first few steps are the hardest. First of all, I will tell you that just knowing this will ease your mind. I think this is common knowledge for those who have experience with Kogin embroidery, but the first step and the following steps are the most difficult times. If you have started embroidering right away and are thinking "Wow!", don't worry. You are currently in the most difficult area. Once you pass, the steps in the most difficult area will become the backbone that will support your progress in Kogin embroidery beyond that. Please take your time and encourage yourself by saying, "Now is the hardest and most important time."
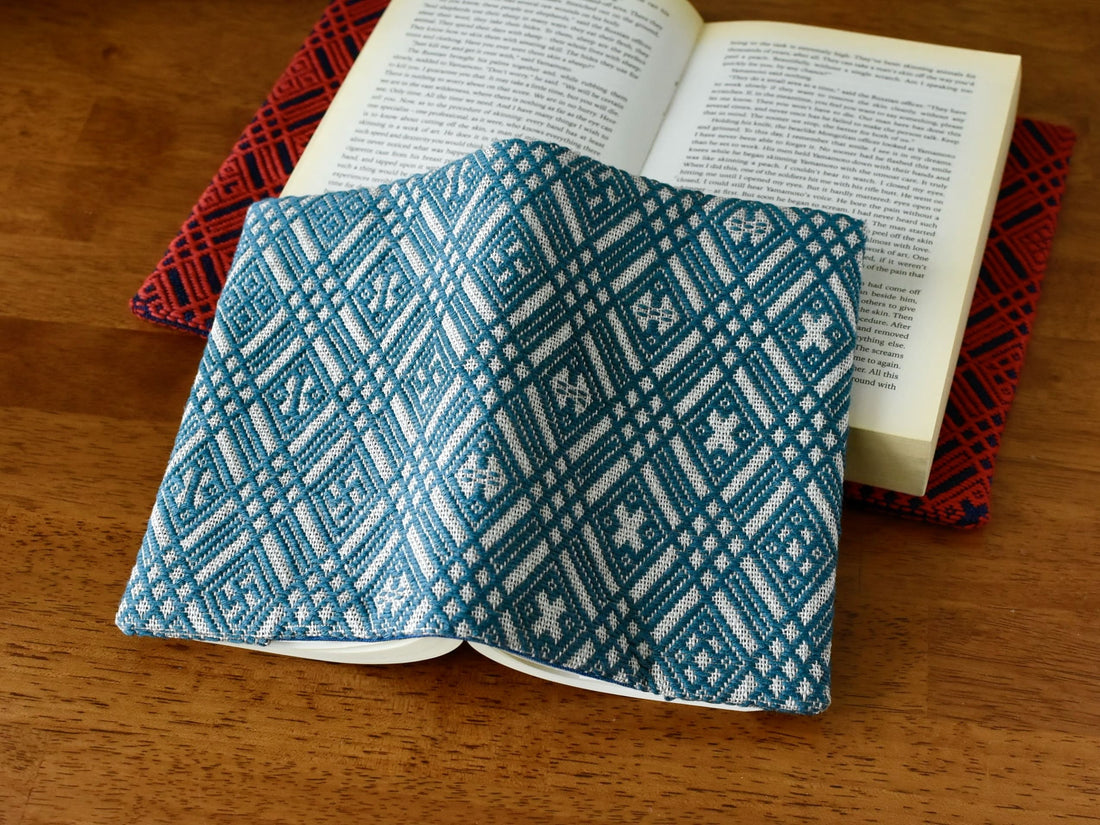
◆Think in sections, proceed in sectionsAnd I will give you my own hints on how to proceed in the first stage. Below is a kogin stitch for a book cover that I have finished. The red lines below are "sections that are easy for me to recognize" . These sections will become wider as I get used to them, and narrower when I am not. I generally use the boundaries of the pattern as the division points. This design is designed so that the modoko is embedded in the cutout of the main frame design. Therefore, the main frame is repeated over and over. When it comes to repeating designs, the more you stitch, the more the rhythm of the design will become ingrained in your body, so if you set divisions like the ones below, the rhythm of the entire design will be in order. There are many different types of modoko, so you will have to look at the design until you get used to it, but if you stitch roughly between the yellow lines (about the height of the modoko), it will become much easier.

◆The best place to start stitching is the center of the entire design . Fold the fabric in four to confirm the center. You can also use a ruler to measure the length. The design (and fabric) you received is larger in both length and width than the stitching area you think you will need (the approximate stitching area is shown with colored lines), so please take shrinkage into consideration when stitching. (The length taking shrinkage into consideration is stated in the instructions.)
However, as I wrote in the "Safe Points" section , the pockets in this kit are deeper than before. Therefore, even if the width is shortened by a few centimeters, you can just make the pocket shallower, so if you feel that the width is too long and you are about to give up, it's okay to shorten it! If the width is too long, it will be difficult to use thin books because they will not be able to stabilize their position, so I think it's best to adjust the width to the specified length or slightly to match the thickness of the book you have. However, the length (height) should be four rows (or more) larger than the actual book. Of course, if it's too large, it will not look right, but this time the pockets are designed to be deep, so even if the length is a little longer, it is less likely to lose stability.
◆What is the best length of thread? I use a long thread for the unskilled, a small thread for the skilled. I usually prepare about 6 layers at a time, occasionally untangling the thread as I pull it. (It may seem inefficient, but that length seems just right for my concentration.) However, while Handicraft Fan and Tsukiya's Kogin threads do not damage the thread, I think Tsugaru Kobosha's Kogin threads should be at most 3-4 layers long, considering the damage to the thread.
If you are doing Kogin embroidery for the first time, it is best to cut the thread two rows at a time, or one row at a time, and proceed. If you make a mistake and have to go back, if you do two rows, you will not have to pull out as much thread as you made a mistake. (You only need to pull out the thread from the edge of the row you made a mistake.) In the end, it is best to have a length that will allow you to maintain your concentration and that can withstand friction , so I think the ideal length will vary from person to person. It can be mentally taxing to have to pull out threads because you made a mistake after working hard on the stitches for so many rows, so try to adjust it carefully to keep the "fun axis" in mind.
◆Can you make it even if it's your first time ? You can make it even if it's your first time. If you proceed with a happy mind and thread threading above all else, over time, the entire cloth will be covered with plump Kogin threads. A happy mind will help you maintain your concentration, so if you're not enjoying it for some reason, try refreshing yourself. If you think, "Ah, I think I want to do Kogin embroidery soon!", please pick up the Kogin cloth. Also, if you're sleepy, it's better not to force yourself to continue. I often pushed aside my sleepiness and proceeded with several steps, only to have to undo them the next morning. Lol. Concentration is important in addition to fun to do Kogin embroidery accurately. Lol However, even if you make a mistake, if you can recover on the next step, it's of course OK to enjoy the mistake and continue as it is, thinking of it as your own signature on Kogin!
This has gotten long, so that's all for today. Some people said that the tailoring will be done by hand, so I will try to hand-sew the paperback-sized Kogin that I am currently embroidering. I will also share any tips on tailoring.
Please also take a look at the blog I wrote previously about tailoring . I'm not very good at tailoring, so I just do it very carefully. I think I always have the sense of a beginner, so I wonder if there is anything useful written here that will be helpful to those who are tailoring for the first time? (I'm sorry if there isn't.)
▶︎Goldfish Nebuta Kit Design and Instruction Data Sales・Gentle Face Goldfish Nebuta▶️ minne Sales Page
・Goldfish Nebuta with a brave face▶️ minne sales page
▶️Materials Research Blog
▶️Shop (We plan to expand the digital design lineup in the future, except when we are temporarily back in Japan)
▶️Instagram (We share the simplicity and fun of Kogin embroidery through videos, etc.)
Satonobou