
Book Cover Creation Tip #3
◆ Tips for making a book cover kit 3
First of all, I apologize for the inconvenience caused by the confusing blog location of the kit, but the introduction of the kit can be found here ( Kogin Embroidery Kit Introduction in the menu). I would like to adjust the site by the end of the year.
I've written Tips for Making Book Cover Kits , Tips for Making Book Covers 2 , and now I'm thinking, "Oh, there's more!" There's more. (laughs) After making five prototypes, the kit is complete, and even the instructions, which I thought were condensed, are quite voluminous, but the more I make, the more I want to convey this, that, and so on... I'll be updating the blog, so please check it out for updates!
◆Points on hand sewing
◯ Double knotsI think the biggest difference between hand sewing and using a sewing machine is that hand sewing goes slower than with a sewing machine, but it seems like a good idea to double the knots so that they don't slip out easily.
◯ Sew using the grain of the fabric This is something I just thought of because I'm not used to hand sewing and the fabric was thick and I couldn't use a moving stitch, but it was fun to sew at a good tempo by using the grain of the fabric to create a rhythm, like 2 stitches on the back and 1 stitch on the front, especially when sewing perpendicular to the pattern. For the diagonal part on the size adjustment side, you have to empty your mind and just follow the line where you drew the sewing position, but that was fun because it gave me time to notice the rationality of expressing the grain of the fabric in Kogin embroidery.
◯ Use iron-on tape, double-sided craft tape, and craft adhesives. If you use the above craft items for basting the twill tape and finishing the pocket edges (not the side for adjusting the size), you can complete the tailoring very easily. However, since the fabric may become too strong when tailoring the edges (although I think it will become more flexible as you use the cover), it is better to sew it with thread if possible. However, since it is your own book cover, please take my words as a hint only and have fun tailoring it. There is no better tailoring than that, so please feel free to sew it!

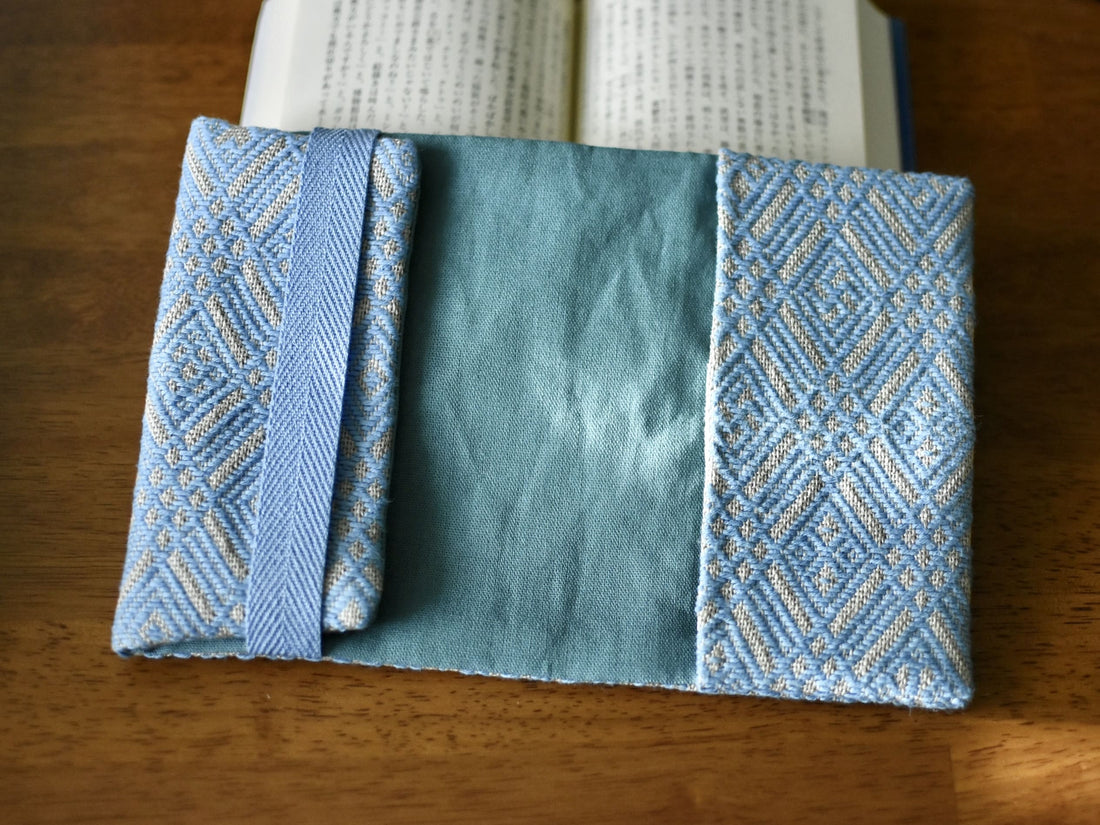
The part circled in yellow above will probably feel a bit stiff right after it is made. This part will soften as it functions as a book cover, but the parts that will bend easily can be softened with your fingernails or a clover roller opener (the tool below) to improve the feel.
However, in the case of a hardcover Kogin cover, the cover of the book itself is thick and strong, so you can be more relaxed than with a softcover Kogin cover. Also, if you want to enjoy the process of slowly getting used to the book, please do not do this and just enjoy the passage of time. Enjoy it in a way that suits you!

◆We recommend using sewing thread for thick fabrics.
As it says in the instruction manual, when sewing with a sewing machine, it's a good idea to use thread (and needle) for thick fabrics. I use Fujix Schappespan 30. The thread is only visible on the edge of the pocket, so if you want it to stand out, choose a sewing thread tone that is lighter than the fabric, and if you don't want it to stand out, choose a darker tone. Since it's polyester and shiny, the sewing thread will have a strong presence on Kogin fabric, which is made of linen and cotton thread, so it will still have a presence even if you choose a darker tone.
I was excited to interact with everyone after such a long time, and this blog about creative tips ended up being a bit of a chat. However, what I want to convey consistently is not, "Let's make accurate Kogin embroidery and accurate book covers!" but, "Let's make fun Kogin embroidery and fun book covers! Let's have fun with Kogin! "
It may seem extreme, but if, for example, you find that the width of your Kogin stitch is 15cm short, you can add a piece of fabric that has been embroidered separately, or a piece of fabric that has not been embroidered with Kogin stitching. What is more important is to enjoy the joy of completing something with your own hands .
From around the beginning of the new year, I plan to start making large works that respect traditional patterns, and I have a lot of ideas, but I would like to have everyone who enjoys this event decide the definition of "large" for themselves. It could be "a single tatami mat is large," or "a book cover is large," and as long as it's a challenge for you and you enjoy it, that's OK. I'm also planning to take surveys on Instagram and other platforms in the future, so if you're interested, please join us.
▶︎Goldfish Nebuta Kit Design and Instruction Data Sales
・Goldfish Nebuta with a gentle face▶️ minne sales page
・Goldfish Nebuta with a brave face▶️ minne sales page
▶️Materials Research Blog
▶️Shop (We plan to expand the digital design lineup in the future, except when we are temporarily back in Japan)
▶️Instagram (We share the simplicity and fun of Kogin embroidery through videos, etc.)
Satonobou